June 29 – July 1, 2004
These restored messages come from the Quilt History List, an online forum where quilt historians, collectors, researchers, appraisers, and enthusiasts discussed antique quilts and related textiles. The archive dates from 1996 through approximately 2016 and is being restored gradually. Sign up in the form at the bottom of the page if you want to know when a new page is added. Original spelling, opinions, formatting, and inactive links may remain unchanged.
Primary topics of this QHL Digest:
- Oil-Boiled Calico — Louise’s question about oil-boiled calico in an 1885 quilt produces historical context from Joan Kiplinger and Laurette Carroll on the Victorian practice of boiling fabrics in oil to intensify dye colors. (see the article on cotton and textile terms)
- Quilt as Power Object — Intuitive Finds — Pepper Cory describes an uncanny experience of being psychically drawn to a quilt find, and Xenia Cord and others offer their own stories of seemingly fated discoveries.
- 1818 Embroidered Sampler Research — Peggy Notestine describes an embroidered sampler inscribed ‘Jane W. Roberts Merion B. School 1818’ and asks for help with its provenance; Patricia Keller identifies the Lower Merion Boarding School.
- Mouse Hole Repairs in Antique Quilts — J. G. Row shares her experience restoring a circa-1910 quilt top damaged by mice, and a friend’s creative suggestion to appliqué hearts over remaining repairs. (see the article on quilt restoration)
- Quilt Display and Hanging Methods — Holice’s question about hanging quilts at shows generates practical suggestions from Barb Garrett, members, and Xenia Cord on binder clips, skirt hangers, and conservation-safe methods. (see the article on caring for antique quilts)
Date: Tue, 29 Jun 2004 09:08:55 -0500 (CDT) | From: sadierose@
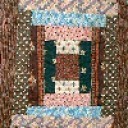
If the clips are on the foundation fabric only, could they have been made to help position the center square to get the block started correctly?? Folding the fabric in quarters and making a tiny snip, rather than measuring and marking?? Just a thought… Karan from sunny & beautiful Iowa
Date: Tue, 29 Jun 2004 10:09:24 EDT | From: Crm793@
Maybe the little holes in the foundation squares were just to mark the centers. Take a square, fold it twice and snip across the folded corner, open it up and you have the small diamond shape in the middle.
Carolyn
Date: Tue, 29 Jun 2004 07:25:10 -0700 (PDT) | From: Kris Driessen <krisdriessen@>
I’m not sure how a log cabin can be sewn in strips – I would think it has to be done block by block.
I have seen two “quilt as you go” log cabins from the 19th century. The one I have was made block by block, sewn to a muslin foundation which also served as the backing. The blocks were sewn together with the seam exposed on the back. The exposed seam were then given a french seam treatment, which is like the seam on the outside of your jeans.
The other one I saw in a quilt study groups – Judy’s? It was silk, with a center square which was batted before being sewn to a foundation. Each individual log also had a precisely cut strip of batting which was evidentally inserted under the log before it was sewn down by the seam of the next block. That quilt had loose seams on the back, but it was covered by a backing and then tied.
Yes, I would say that was labor intensive!
Kris
Date: Tue, 29 Jun 2004 07:36:21 -0700 (PDT) | From: Kris Driessen <krisdriessen@>
Well, serves me right for posting without reading all the comments first. I would guess one of the quilt pictures Judy posted is the one I remember.
While you are on the E-board, take a look at the picture of my office. The quilt on the wall was put together by Sally Ward using blocks donated to her by the British Quilt History group in the style of their pink and white strippy list emblem. (http://www.bqhl.co.uk/) It is machine quilted with hearts.
The other quilt made of blocks donated by this group *is* being worked on. I will post a picture as soon as I can.
Kris
Date: Tue, 29 Jun 2004 10:03:52 -0500 | From: Gail Ingram <gingram@>
Wht a smart girl you are.
Let’s talk if you have time tonight.
Things up ad down here—roofers on roof in pouring rain, plumbers in kitchen for stopped up drain (Oh my word, a poem is on its way!) Nona sends regards.
Gail
Date: Tue, 29 Jun 2004 11:22:32 -0400 | From: “Beth Davis” <bethdan533eznet.net>
Nancy, You’ve described the Genesee Country Museum quilt to a ‘T’!! But will the holes remain a mystery to us all??
Regards, Beth
And, the holes are too tiny to have pulled much of anything through. Someone thought maybe they were to mark where to eventually put ties, but, once a back would have been put in place, you would not have been able to see the holes in the foundation blocks. And, on the right side, the center blocks are bright red wool squares-you could easily “eyeball” where center was is you were worried about centering ties. The 20-some inquiring minds at Fran’s that day had no answer. Hope someone else can come up with something!
Nancy Hahn
Date: Tue, 29 Jun 2004 10:33:31 -0500 | From: Gail Ingram <gingram@>
Sorry for directing mail to list that was meant for member.
Thinking faster than I look and type, Gail
Date: Tue, 29 Jun 2004 10:52:50 -0600 | From: Xenia Cord <xenia@>
it appears to me that there is a basic difference between Pam Worthen’s “potholder” quilts, and the more conventional “quilt as you go” Log Cabins. The potholder quilts are composed of finished units, not unlike a potholder, that are one repeat of the designated block, with batting and back, and quilting through the unit, and finally – binding on all 4 sides of the unit. These completed units are then joined by whipstitching in the same style as English paper pieced units are whipped together.
The Log Cabin QAYG blocks are joined to each other on the front, raw edges together, after the logs have been sewed to the foundation layer in a flip and sew construction. If the foundation layer is also a decorative print, the raw edges of this layer can be turned under and the blocks whipped on the back. This creates a 2-layer quilt.
Another version of Log Cabin QAYG adds a square of decorative fabric to the sandwich, covering from the back the foundation layer with its exposed stitching. The raw edges of the outer logs are turned over this back and blind-hemmed, creating a binding around the unit. Then the blocks are whipped together, creating a “potholder” quilt format. This creates a 3-layer quilt.
Trying to sort it all out –
Xenia
Date: Tue, 29 Jun 2004 12:25:25 -0700 (PDT) | From: Gary Parrett <gparret1@>
The Genesee Country Village and Museum has a web-site: www.gcv.org This will give you more information on the show.
On another note, I have been in contact with a “biscuit” quilt, and wondered if anyone has any information on their origins. I have no picture, but will try to describe it. Basically, it is made of squares. The foundation fabric is approx. 3″. This particular quilt uses upholstery weight brocades to cover the foundation piece. They are cut into a larger square, gathered or almost pleated at the corners and sewn to the smaller foundation. This leaves a puffed center which has been stuffed before the upper fabric is completely sewn to the foundation. The edges of the puffy squares are then sewn together by hand to form an interesting crib-sized quilt. This one is then edged with various colors of velvet. Very colorful. It is not backed.
A lady came up to me at a quilting demo and showed me a portion of a plastic wrapper with a picture of one of these in pink and blue. It looked like the wrapper may have come from a package of polyester stuffing or something of that sort. I couldn’t give her a much information. Any you have would be appreciated.
Karen
Date: Tue, 29 Jun 2004 15:58:24 EDT | From: Edwaquilt@
We are on the trail of what might be an outstanding quilt collection for the Rotary in Paducah next year. The Collection spans several generations of quilters and needleworkers in one family and some are probably made by slaves on the familie’s plantation. The owner is concerned about hanging them and was somewhat worried about the word “sleeve” beling sewed on the backs.
We need advice and information about the proper way these early quilts can be displayed.
Holice
Date: Tue, 29 Jun 2004 19:25:01 -0500 | From: “Karen Quilts Texas” <karenquiltstexashouston.@>
Karen –
I’ve seen these in a number of older books on quilting from the 1970’s and early 1980’s. Apparently there was a lot of interest in them then. They do look like they came from outer space to me! 🙂
Karen A. Spring, TX
—–Original Message—– From: Gary Parrett Sent: Tuesday, June 29, 2004 2:25 PM To: Quilt History List Subject: [qhl] Genesee Museum website and Biscuit Quilt
The Genesee Country Village and Museum has a web-site: www.gcv.org This will give you more information on the show.
On another note, I have been in contact with a “biscuit” quilt, and wondered if anyone has any information on their origins. I have no picture, but will try to describe it. Basically, it is made of squares. The foundation fabric is approx. 3″. This particular quilt uses upholstery weight brocades to cover the foundation piece. They are cut into a larger square, gathered or almost pleated at the corners and sewn to the smaller foundation. This leaves a puffed center which has been stuffed before the upper fabric is completely sewn to the foundation. The edges of the puffy squares are then sewn together by hand to form an interesting crib-sized quilt. This one is then edged with various colors of velvet. Very colorful. It is not backed.
A lady came up to me at a quilting demo and showed me a portion of a plastic wrapper with a picture of one of these in pink and blue. It looked like the wrapper may have come from a package of polyester stuffing or something of that sort. I couldn’t give her a much information. Any you have would be appreciated.
Karen
Date: Tue, 29 Jun 2004 20:08:29 EDT | From: HKnight453@
I have seen instructions for these in various magazines, pattern catalogs, and on packets of cotton batting back to the early nineteen-fifties, but more commonly from the late sixties. Some examples I have seen have an added backing with turnover bindin to hide the stitched back. Heather
Date: Tue, 29 Jun 2004 19:51:21 -0700 (PDT) | From: billie nelle <billienellepearson@>
Jccullencrew@ wrote:HI Debbi. Welcome to the group. I’m so happy to hear that you’ve opened a shop…in my area there is only one LQS (local quilt shop) about 15 miles away. There is another one which takes about 45 minutes to get to…with the price of gasoline, I try to get everything I need at one time! I’m very happy you’re doing well and wish you continued success in your business. Best regards. Carol Grace
Date: Tue, 29 Jun 2004 | From: Jennifer Hill <jennifer.hill@>
This thread brings back memories….. My first ever quilt was a biscuit one, ca 1973. I’m sure I found the basic instructions in a magazine, which was likely pulped years ago. I used silks, and silky-like fabrics – lots of poly lining, and suffed them with poly. I thought the raw edges where I sewed the squares together (every stitch by hand) too lumpy to be covered just by a lining, so I added a layer of batting and quilted the whole thing. My mom thought I was nuts and refused to help with the quilting, so I did it all myself. I still have this quilt. It’s a heavy one.
Jennifer Hill Calgary, AB
Date: Wed, 30 Jun 2004 08:34:37 +0000 | From: pkeirstead@
I’m late coming in on the subject of big boards, but I want to note that they can be made from sheet metal. The small, built-in ironing board in my sewing room was made of particle board and began to swell. I didn’t want to replace it with a wood product, so I took it to a sheet metal shop. I had them copy the small board, and make a big board (18″ by 48″) to fit on top of it. I was advised to spray-paint them both to prevent rusting. I then covered them both with layers of a white wool blanket, ironing board cloth purchased at a fabric store, and muslin. (I found directions for this on the Web.) The big board is heavy but manageable. I prop a yardstick under the tip of the small ironing board to support the extra weight. I don’t need to tell you how handy this big board is. From soggy north central Texas (is it raining all over the country?) Peggy Keirstead –NextPart_Webmail_9m3u9jl4l_2178_1088584477_0–
From: Joe Cunningham <joe@>
If you are going to be in San Francisco in the next six weeks, please stop and visit my quilt show in the Presidio. It is in the Herbst International Exhibition Hall, 85 Moraga, at the corner of Montgomery and Moraga. Last year I got a $30,000 grant from the Fort Mason Foundation to do this six-week exhibition. It is called The Life of a Quilt. There are my nine most recent quilts, 17 antique quilts from which I have taken ideas, a “How a quilt is made” section and a kid’s area, where kids can apply patches to sticky paper to make their own “quilts” to take home. (Some of these antique quilts are real doozies.)
Admission is free. I will be there quilting the entire time of the show: 10AM-4PM Wednesday-Sunday, from July 1 to August 8. That way I can teach hand quilting, conduct tours and shoot the breeze all day. If you need help with your quilting stitch, come on by!
The opening party is tonight, Wednesday, June 30th, from 5:30 to 8 PM. There will be refreshments, a great band and a lot of quilters.
If you have any questions, call me at 415 939 2602. Joe Cunningham
From: Anne Copeland <>
What excellent advice, Judy about dating the quilts. As appraisers, we too have come to do that sometimes using as our range 1st quarter of the 20th century, etc. because as you noted, it is difficult if not impossible to determine when a technique arose since so many types of quilts were being made in so many different ways throughout the world. And in little pockets of the world such as the Appalachians or the South, there were so many little odd ways of doing things by the folks who didn’t have everything available.
This is another topic, but I was recently in a Cost Plus store and was so amazed to see some beautiful reverse applique Indian quilts that had amazing designs on them. I would have bought one because they were so nicely designed with very intricate and unique designs from the area, and the colors were great. The workmanship was amazing too. But the prices were high — around $200 for all of them, and I think one was priced higher. They also had some heavily quilted wholecloth quilts. Really caused me to look for a long time. Peace and blessings, Annie
From: Barb Garrett
Holice –
This may not be as formal as you are hoping for, but my quilt guild, Variable Star Quilters, uses skirt hangers to hang quilts at our show. We hold our show at an auction house — kind of high end — nice stuff — and the owner told us about the skirt hangers. That’s his method for hanging the antique quilts he sells at auction. By putting the hangers right next to each other, the weight is distributed, and we don’t have to ask anyone to sew on a sleeve to loan us their quilt I don’t know what your owner’s concern is with the sleeve, but this method has 2 advantages — saves time, and there are no stitches being put into the quilt.
Barb in southeastern PA
From: Litwinow@
Good afternoon, The Iowa Quilter’s Guild and the Mississippi Valley Quilters Guild use skirt hangers (borrowed from local Kohls). Fabric is placed between the metal clamps and the quilt. No sleeves are needed. Cathy Litwinow
From: Judy Knorr <jknorr@>
Finally!!! I’m old enough to give some input on a type of quilt I actually made!! I made a biscuit quilt Christmas wreath in the early 70s. The bottom square was cut about 3″ and the top square was about 4 1/2 inches. The squares were stitched together with pleats at the corners. One side remained open for turning and stuffing with polyester filler. The individual blocks were then sewn together in rows (I think I hand sewed mine together) to make a flat quilt or in my case, three or four circles to fit over a wire wreath form. I used that wreath for many years and liked it a lot. The fabrics were not all Christmas fabrics, but rather reds, greens, blues and golds of many designs. Hmmmm, wonder if I still have that around in the basement crawl space…only time will tell as I’m not going in there right now! Judy
From: “Marilyn Maddalena Withrow”
The discussion on “biscuit quilts” is interesting — and although I’ve seen them since the 1950’s, I also have two that were made by my great-grandmother in Iowa before the turn of the century — not this century, the last one! :>) This great-grandmother came to live with my grandmother and her family in the early 1900s and brought with her two of these quilts which she had made several years before. They are matching, although one is very bright and one has a lot of light damage. The bright one was kept in a cedar room at my grandparents’ home; the light damaged one was displayed on the parlor couch. They are made of velvets and corduroys and are shaped similar to what might have been called a casket quilt. I use them in my program “Potatoes to Patchwork” to illustrate light damage. So at least we know “biscuit quilts,” or Victorian puff quilts, as I called them, did not originate in the 1950s. I just remembered, there’s a picture of part of the best quilt on the first page of my website, if you want to check it out. www.marilynquilts.com. Oh, by the way, the discussion of the holes in the back of log cabin quilt blocks — is there any chance the fabric had black dye on it which ate through? Just a thought. Marilyn Maddalena Withrow Professional Quilt Appraiser, Judge, Historian, Designer and Speaker
From: “Virginia Berger”
One of the guilds I belong to hangs their annual show using plastic, clamp style skirt hangers like you see the stores use to display clothing. They use 3-4 hangers per bed quilt though more could be used. The hook part swivels so that you can hook them over the back drop rods.
This wouldn’t be practical for the show but maybe the concept would help: one of the local shops is carrying a different type of quilt hanger. It is a simple three sided wooden box, you hang it on the wall with the open side down, the front is hinged so it can be opened up. On the inside there are cuphooks coming down from the top piece and they supply you with 3/4″ binder clips (from office stores, metal with handles). You clip the binder clips to the quilt, slip the handles of the clips over the cuphooks and close the front piece to hide the hooks. It looked like the hooks were spaced 3-4 inches apart. This idea tickled me because I use those office clips in a variety of sizes for all sorts of things and in fact my “design wall” is a flannel backed table cloth hung (flannel side out of course) using three of these binder clips with the handles hooked over small nails high on the wall.
Virginia Berger
Subject: Log Cabin quilts From: Paul and Nancy Hahn <phahn@>
Carolyn and Karen, your idea about the tiny snip in the foundation fabric of the log cabin block to aid in centering the first square patch makes sense to me. I am going to try and find time to go through the rest of my log cabins to see if any others have this snip. Thanks for your insight.
Nancy Hahn, Bowie, Maryland
From: Paul and Nancy Hahn <phahn@>
Carolyn and Karen, your idea about the tiny snip in the foundation fabric of the log cabin block to aid in centering the first square patch makes sense to me. I am going to try and find time to go through the rest of my log cabins to see if any others have this snip. Thanks for your insight.
Nancy Hahn, Bowie, Maryland
From: Jennifer Perkins
Does anyone know of a skilled person who does Crazy Quilt restoration? I have one here I don’t want to deal with, but the clients said time and money were not a problem, it is a family piece. It needs a new backing, is tied, and needs some patches replaced with embroidery repaired. You can email me directly. Thanks! Jennifer in Iowa
From: “Laura Syler”
CQ’s have seem to become my specialty. You may give her my contact information.
Laura Hobby Syler Richardson, Texas 972-437-0884 Certified Appraiser of Quilted Textiles Quilt Restoration Specialist Teacher, Lecturer, Writer Exhibits and Conferences —– Original Message —–
From: Gary Parrett <gparret1@>
Thankyou to all who replied to the question of the biscuit quilt. It’s fun and interesting to read your stories. I was only a little shaver(sprout, squirt, funny names that had for us kids) back then in the 50’s. Were the puffed quilts of Victorian times another form of crazy quilt, mainly made to look at? The example which I saw wasn’t exactly what would be comfortable to snuggle under on a cold winter’s night. However, it was interesting and would make a good conversation piece.
Ah, the 50’s…remember Burma Shave signs?
Karen
From: Peggy Notestine
Hi, The very first quilt I made was in 1972 when I was 11 years old was a biscuit quilt. It was a biscuit quilt in blues and yellows. I was suppose to make two of them and only finished one. I still have the Simplicity pattern for it (I think it cost $1.25!). Actually, I still have some of the fabric I used in it too! Each biscuit contained three layers of the thickest polyester batting out there. After the biscuits were done, I butted them up together and zigzagged the seams together. I seem to remember it being very heavy. I eventually sold it at a yard sale in 1989…by then it was falling apart and the batting had slipped into corners…..it looked pretty well loved.
Now on to my next plea for any help you might have.
I am the proud owner of a very old embroidered sampler that my father gave me as a sort of wedding gift 20 years ago. He bid on a box of frames at an auction in Logan County, Ohio (50 minutes northwest of Columbus Ohio) and this sampler was sitting in a frame at the bottom. Had anyone actually looked through the box, I am sure his bid of $1.00 might have garnered at least a few other bids from other people. After he got the box home, he found it and gave it to me since I always liked needlework. I carted this frame around until about 10 years ago, when I took it to a framer and asked her opinion and she said to take it out of the frame as the barn siding was probably doing more harm than good. She removed it from the frame and wrapped it in acid free paper and placed it in a tube where it has been since then. Interestingly, there had been a picture under the frame…it was a black and white pencil drawing of cherubs and for the life of me, I can’t find that one (hope it wasn’t worth millions of dollars!) Anyway, 20 years ago, I actually tried to find out some info on it and since the internet wasn’t around then, I didn’t get very far. In cleaning out a closet the other day, I stumbled across it again and thought I’d asked this valued group of people if they knew anything about it.
Here’s what the sampler says: Extract. Hail gentle hope, prupitious power; Sweet harbinger of joy and peace, Thy smiles cheer midnight’s gloomy hour; Thy magic voice bids discord cease, Thy presence banishes despare, And smoothes the anxious brow of care.
Jane W. Roberts Merion B. School 1818
It is all embroidered on linen, there is a border of strawberries around the edge and little swans at the bottom and lots of various flowers The colors have faded (if you look on the reverse side it is much more colorful), but overall, I think it’s in pretty good shape.
Would anyone know where the Extract is from and does anyone have any insight as to the appropriate person to contact to have it conserved in a better manner? Also, would anyone know how best to look up and try and find information about finishing schools?
Looking forward to hearing what you might have to offer on this piece of work. Thanks Again. Peggy Columbus, O
From: “Steve and Jean Loken” <sandjloken@>
Joe, the opening few words of your message had the Cass Elliott song “If You’re Going to San Francisco” running through my head immediately. What a pleasant memory. Sure wish I were nearby to take advantage of this. Sounds such fun. Jean in MN
From: Kris Driessen <krisdriessen@>
If you don’t know
Whose signs these are
You can’t have driven
Very far
Burma Shave
http://www.quiltbus.com/burma.htm
From: Judy Schwender
As any wood can off-gas, be sure that the quilt is not in contact with the wood. Better yet, acquire the wooden box two weeks before use and seal it with two coats of alkyd-based polyurethane. See: Conservation Concerns: A Guide for Collectors and Curators, Konstanze Bachmann, ed., Smithsonian Institution Press, 1992, p.74.
Virginia Berger <cifba@> wrote: One of the guilds I belong to hangs their annual show using plastic, clamp style skirt hangers like you see the stores use to display clothing. They use 3-4 hangers per bed quilt though more could be used. The hook part swivels so that you can hook them over the back drop rods.
This wouldn’t be practical for the show but maybe the concept would help: one of the local shops is carrying a different type of quilt hanger. It is a simple three sided wooden box, you hang it on the wall with the open side down, the front is hinged so it can be opened up. On the inside there are cuphooks coming down from the top piece and they supply you with 3/4″ binder clips (from office stores, metal with handles). You clip the binder clips to the quilt, slip the handles of the clips over the cuphooks and close the front piece to hide the hooks. It looked like the hooks were spaced 3-4 inches apart. This idea tickled me because I use those office clips in a variety of sizes for all sorts of things and in fact my “design wall” is a flannel backed table cloth hung (flannel side out of course) using three of these binder clips with the handles hooked over small nails high on the wall.
Virginia Berger
Date: Thu, 1 Jul 2004 13:15:27 EDT | From: CJEdgar@
This came up years ago at one of the Quilt Restoration workshops. As I remember, the weight of an antique quilt can be supported with a 15 degree slant board (about two feet out from the base of an eight-foot tall wall). The angle is enough that gravity will pretty much hold the quilt on the board and the entire quilt is supported rather than hanging from a strip at the top. For something you REALLY don’t want to sleeve, you could use a couple of thin foam insulation panels (covered with muslin or flannel or something similar) on the tilt board and insert straight pins along the top edge to keep it from slipping. Someone came up with the idea of building a fabric sling that might work as well as a rigid board but would be more portable. I don’t remember that anyone ever got as far as drawing up any plans for one, though. You might check with either Nancy Kirk or Rabbit Goody ( www.rabbitgoody.com ). Slant boards probably wouldn’t be practical for the entire exhibit, but may well be doable for the most fragile pieces.
Kate Edgar East Lansing MI
From: louise-b <vlbequet@>
What is ‘oil-boiled’ calico? I was looking through a book, Quilts from Nebraska Collections, nd, and on page 36 this is shown in a Bursting Star quilt.
Louise Bequette — in mid-Missouri
Date: Thu, 1 Jul 2004 14:35:15 -0400 | From: “Pepper Cory” <pepcory@>
Hello friends-Forgive the digression. I’ve been teaching in Wilmington NC this past weekend and Sunday had time off. Took the ferry to Southport NC (lots of antique shops) and the hunt began. I had a strong feeling that ‘something’ was waiting for me and I needed to find it–that day. Entered a shop and knew the ‘thing to be found’ was there. One pass through–some nice quilts but nothing special. Settled down to a nose-to-the-ground-examine-everything snuffle and there, in room #2, on the bottom shelf behind a cake tin, I found it. A North Carolina Lily quilt, in early butterscotch calico and yellow-green, quilted beautifully (alternate white blocks have complex bouquets of flowers), flat as a pancake, 13 stitches to the inch, a corded binding, and a running vine with pomegrantes applique border! It was labelled a ‘cutter’ because a mouse had done its dirty work right through the folded quilt. Some damage to the green applique bits but nothing I can’t repair.20 The shop keeper nattered on about it being a cutter and wouldn’t I get a lot of pretty pillows form it etc. etc. I bundled up my beauty and couldn’t get out the door fast enough! What I paid for it is not the best part of the story (less than $100 for those who really have to know-) but that I think the quilt called to me. I know-sounds weird but I have a history of snooping out quilts in need of rescue. My husband calls it “following the power object.” After I bought it I knew there was no more business at hand. Had an iced coffee and headed back to Wilmington, taking a side detour through Orton Plantation where the live oaks are so big and old three people can’t get their arms around the trunks. Lots of movies have been filmed there. Upon getting to my temporary home in Wilmington, I spread the quilt out and took a detailed inventory. About 20 hours of restoration work, need to find some of that lovely faded yellow-green-used-to-be-a-calico-with blue flowers, measured it (a hefty 80″x100″), and realized it was an 1840-1860 piece.That quilt needed to be rescued, that mean lady was going to cut it up, it called to me, and now it’s found a new home and someone who will treasure it. Anyone else got “tales from the psychic quilter?” >From the windy wonderful NC coast- Pepper Cory
Date: Thu, 01 Jul 2004 16:28:10 -0400 | From: Patricia L Cummings <quiltersmuse@>
Judy Schwender wrote:
Better yet, acquire the wooden box two weeks before use and seal it with two coats of alkyd-based polyurethane.
Dear Judy:
This is surprising. I’d always heard that urethanes tend to “gas off” and that polyacrylic is a superior barrier. Any conservators on the list care to comment?
Pat in sultry NH where the clouds are moving in
Date: Thu, 1 Jul 2004 17:15:38 -0400 | From: “J. G. Row” <JudyGrow@>
Peggy,
Here are the web sites for the two finest sampler dealers in the country. There will be many samplers to compare on each web site. Often, samplers from any one school will be very similar, so you may find another sampler from the same school from which you can glean information about your sampler.
http://www.antiquesamplers.com/samplers/index.html
http://www.samplings.com/
I’ve googled the lines in the extract in various combinations and nothing turns up. Nor does the Merion B. School.
For more information you could try and find the book, “Creating Historic Samplers” by Judith K. Grow and Elizabeth McGrail, (Pyne Press) long out of print. Or the 1973 reprint by Pyne Press of the classic 1921 book “American Samplers” by Bolton and Coe. Your library may have both books, or search for them at www.Abebooks.com
You could also sign up for the study center I will be giving at the AQSG seminar in Portland this October. Entitled “To Frame or Not to Frame, How is the Question” the 2 1/2 hours will help you to decode the do’s and don’ts of framing almost any textile. You may not have the expertise, tools or equipment to do your own framing at the end, but you will be armed with knowledge of the proper techniques and the technical language of the picture framer so that when you go in to your local frame shop you will be an informed consumer.
By the way, if it has been wrapped in the same acid free paper for 10 years it is time to get rid of the paper. Good washed muslin can replace the paper.
J. G. Row in Ringoes, NJ judygrow@
Date: Thu, 01 Jul 2004 17:35:13 -0600 | From: Xenia Cord <xenia@>
Hah! Pepper, I can also psych out quilts! I have 2 stories, each long enough to merit a separate post. Here’s one: Went to an auction that promised to go on all day (and did): the woman collected everything, and when she had too much, she put it in a storage shed, locked the door, and started over! The goods were loaded on flatbed wagons in the yard; one flatbed held mounds of 20 gallon lard cans, each full of matchbooks. Another flatbed held clocks of all sorts, some still in packaging and in multiples.
At mid-morning, out of boredom, I bought a cardboard candy box with cardboard quilting templates in it; it was not until after 4pm, and after several hours of selling unused yarn by the boxload, your choice, that the only quilt in the sale came up. It was an unwashed sampler with embroidered names, and became mine after some spirited bidding. I took it to the family for identification, but they claimed they had never seen until the sale.
On examination I found it contained blocks with names, dates from the early 1930s, and the designation WLS, a powerful radio station in Chicago (owned by Sears, the call letters stand for “World’s Largest Store.”) I took home my prize with satisfaction. Late that evening I remembered the candy box; in the bottom I found a letter from one of the people who had a block in the quilt, and addressed to “Dear Radio Friend”!
What are the chances that of all the stuff at that sale, I should get 2 items that go together?
Xenia
Date: Thu, 1 Jul 2004 18:47:09 -0400 | From: “Karen” <@charter.net>
Not sure…was the fabric red by any chance? Oil was used as part of the mordanting process in Turkey Red.
Date: Thu, 1 Jul 2004 17:00:04 -0700 | From: “Laurette Carroll” <rl.carroll@>
Hi Louise, It was believed that using hot oils in various fabric dye and finishing processes made the dyes more brilliant and longer lasting. This was a marketing term used in the late 1800’s-early 1900’s to note that the fabric was of a higher quality and more dependable. It was a technique used in some of the old natural dye methods. In the Kretsinger and Hall book, it is mentioned that one of the authors searched for the old oil boiled fabrics (if I remember correctly ;-)) to make her quilts.
Describing these techniques in detail can be very complicated and requires a library of turn of the century dye books, and a LOT of time.
Laurette Carroll Southern California
Date: Thu, 01 Jul 2004 20:27:52 -0400 | From: Joan Kiplinger <jkip@>
Karen — to add to Laurette, Sears and Wards offered oil-boiled calicoes and turkey reds well into the 1920s. Their sales pitch was colorfastness.
Laurette Carroll wrote:
>Hi Louise, >It was believed that using hot oils in various fabric dye and finishing >processes made the dyes more brilliant and longer lasting. This was a >marketing term used in the late 1800’s-early 1900’s to note that the fabric >was of a higher quality and more dependable. It was a technique used in some >of the old natural dye methods. >In the Kretsinger and Hall book, it is mentioned that one of the authors > > > >